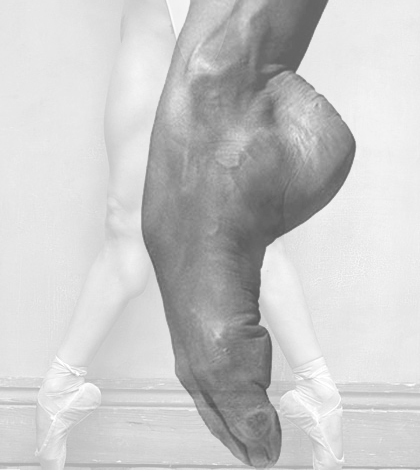
Try these exercises to develop beautifully shaped foot arches.
Click here to visit danceScape’s Global BALLET Dance Forum and meet other dancers passionate about Ballet!
Toe Curls
- Sitting down on the floor, extend your legs in front of you, with feet in parallel position.
- Use your muscles to point your toes as much as you can. Hold for 3-5 seconds.
- Keeping your foot pointed, begin to flex only your toes up as far as they can flex, without moving the rest of the foot. Hold for 3- 5 seconds.
- Now, curl your toes back into a pointed position. Imagine them reaching toward the floor, so you can feel your upper arch stretch. Hold for 3-5 seconds.
- Repeat the entire exercise as much as possible or have a friend help out (See Tip #2).
Tip #1: For advanced exercise, when you isolate your toes to flex them back (Step 3), try flexing only your big toe and baby toe, while leaving the middle toes pointed. Reverse exercise by flexing the three middle toes back and keeping your big toe and baby toe pointed.
Tip #2: Grab a Buddy. For even more fabulous arches, grab a friend who can help you maximize your point and stretch. Your partner will place their hand on your foot and gently push your foot toward the ground when you point. When you flex, your partner’s job is to keep their hand on the top of your foot and gently push down on your feet as you try to flex them up toward the ceiling. This will create a great amount of resistance for your feet to work against.
Calf Raises
- Standing with feet parallel and shoulder-width apart, contract your bottom cheeks, and feel your quads tighten as they pull up your kneecaps (to prevent pushing back in the knee).
- Raise your heels off of the floor as high as you can. Hold for 5 seconds.
- Slowly lower your heels to the ground. Repeat 10 times.
Tip #1: For advanced exercise, perform calf raises on the edge of a step and when lowering your heels toward the floor, try lowering below the step. Another option is to perform the exercise with your feet in various positions.
Tip #2: The higher you can rise on to the balls of your feet, the stronger your toes will become. Also, be sure to feel your feet and calf muscles working.
Do not just use the momentum created from bouncing up and down to lift your body weight.
Tip #3: For variation, alter the speed at which you raise and lower your heels and add 2 or 3 pound ankle weights.
Plie Calf Raises
- Stand with feet in parallel position, near a table, or ballet barre, to rest hands on for balance.
- Plie, by bending at the knees and keeping your knees over your toes.
- In the plie position, lift your heels as high as you can.
- With heels lifted, and legs still in plie position, fully straighten your legs.
- Slowly lower your heels to the ground.
- Repeat as often as you can.
- Repeat entire exercise in different positions, such as the Ballet first and second position.
- Repeat the entire exercise in reverse – with feet parallel, lift heels so you are standing on the balls of your feet. Then, plie your legs, while keeping your feet in the same position. Feel your heels really lift up toward the calf muscle and then lower your heels to the ground.
Protecting the Ankle & Your Range of Motion
- Sitting down, or laying on your back, extend your leg into the air.
- Using only your foot, and not the entire leg, try drawing each letter of the alphabet.
- Try making big letters, as well as small ones, or even try it all in cursive writing. Use your imagination!
Tip #1: If you keep your foot isolated and control all of the movements, you should begin to feel your ankle heat up.This is a good thing to do before and after dancing or exercising!
Tip #2: The benefits of doing this exercises? Increased ankle strength, balance and range of motion! It will also help you prevent injury and create medial and lateral stability in your ankle’s ligaments so you can be strong (and safe) when dancing on your toes, or demi-pointe.
Did you know?
The true ankle joint is responsible for the up and down motion of the foot, while the subtalar joint allows for the side to side motion of the foot.
